Accessing the EDG APIs
In this section, you will learn to use some of EDGs APIs via Swagger. We will focus on three different types of EDG web API; downloading an asset collection as rdf, running the SHACL validator and creating an asset collection. Finally, we show how to integrate services with some sample Python code (this will require a basic understanding of Python). We will be querying over EDG’s sample data, in particular, the “Kennedy Family” Data Graph. You will learn how to test some of the different APIs supported.
To learn more about accessing and using Swagger in EDG, and to get an overview, please consult the following documentation: Web services and Swagger and Swagger References.
Contents
1. Downloading an asset collection as RDF
The first step is to access the reports tab in your target asset collection, i.e. the asset collection which you wish to run your GraphQL query. So, first select the Kennedy Family data graph, go to the reports tab and select “Web Services Swagger UI”. Now navigate to TBS Services, and search for /service/kennedy_family/tbs/exportRDFFile. Click on this and select “Try it out”. You have four fields for specifying parameters for this web service. Two of these are related to inferencing, one is related to filtering certain triples which are required in EDG (e.g. rdf:type), and the final one (the only one we need right now) is the format.
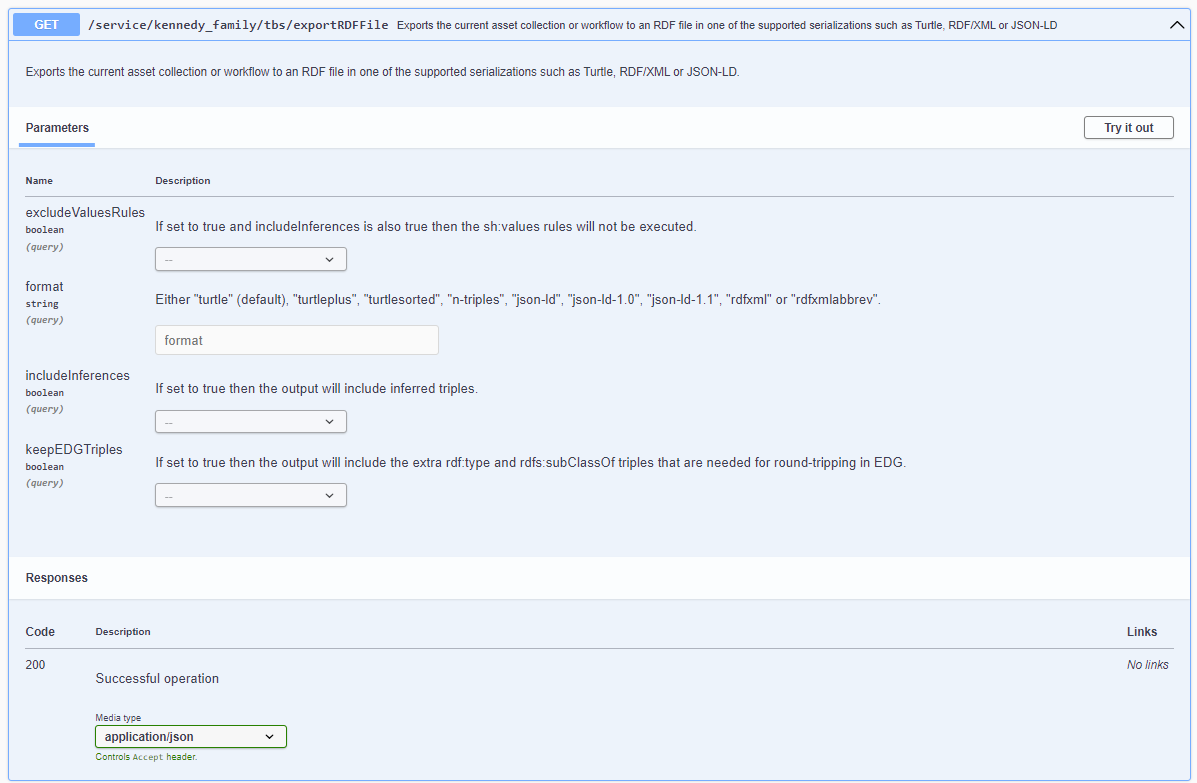
The exportRDFFile EDG web service in Swagger for the Kennedy Family asset collection
In the format field put “turtle” and then click “Execute”. You will see the resulting output in the response body (you can download this as a file).
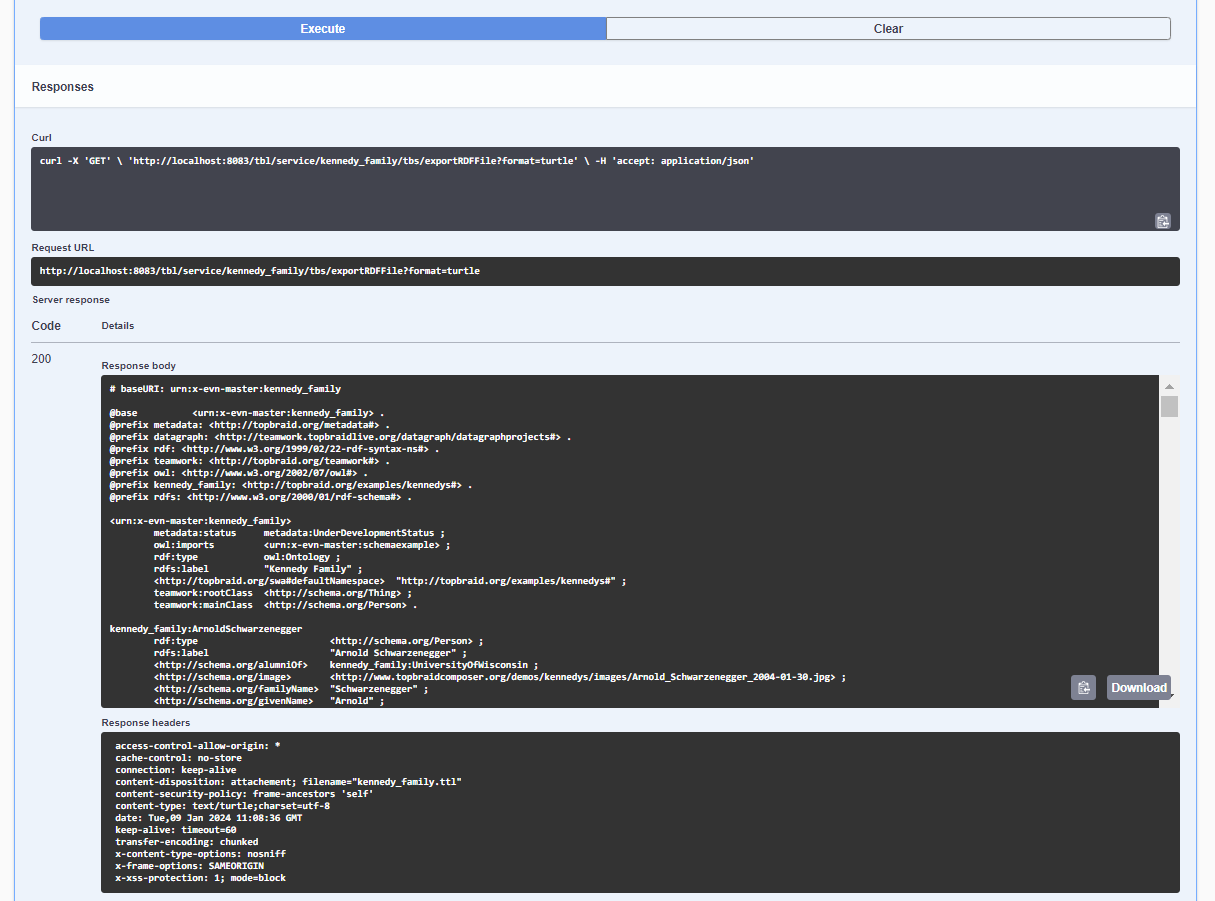
The output from running exportRDFFile EDG web service for the Kennedy Family asset collection
You will also see a cURL command:
 curl -X 'GET' \
'http://localhost:8083/tbl/service/kennedy_family/tbs/exportRDFFile?format=turtle'
When running EDG on SaaS you would replace “localhost:8083” with the URL of your server. This also assumes you are running on localhost with no authentication. For more on the differents methods for authenticating, please see the documentation on authentication
2. Running SHACL validator
Now navigate to TBS Services, and search for /service/kennedy_family/tbs/validate. Click on this and select “Try it out”. You have three fields for specifying parameters for this web service. The first of these allows you to specify a specific target node to validate, otherwise the whole graph will be validated against. The second field allows you to specify a shapes graph to validate against, otherwise the current context graph is used. Finally, you can specify the maximum number of returned results. Click on “Try it out”.
You will see the resulting SHACL report as output in the response body (you can download this as a file).
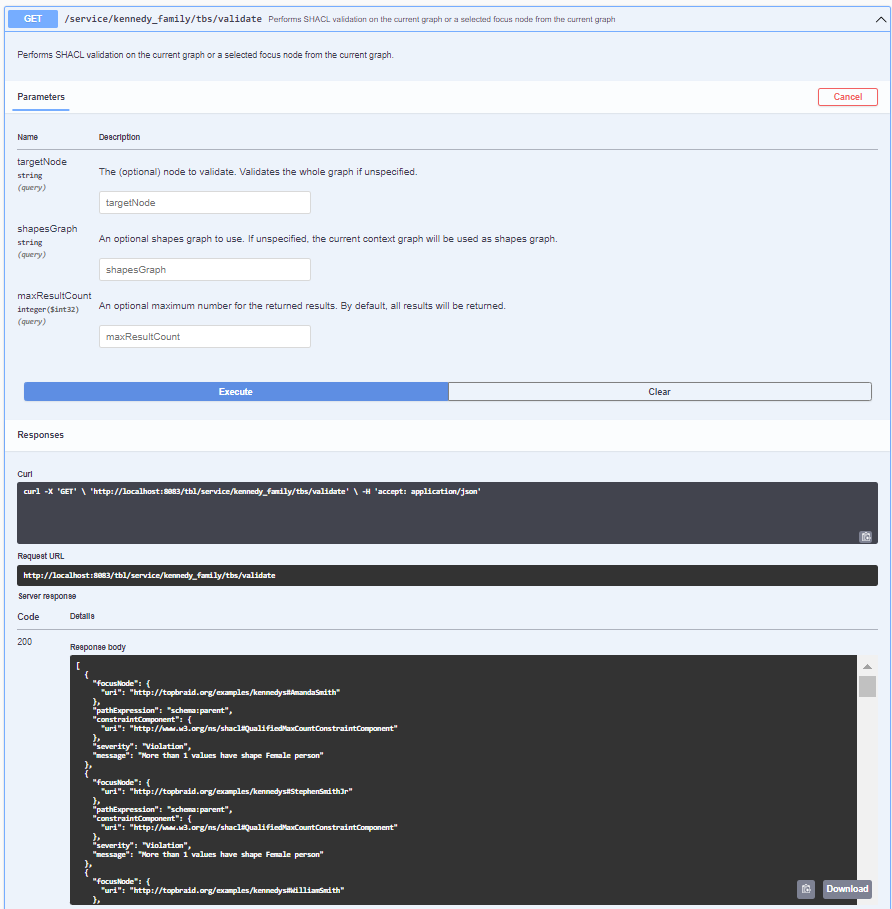
The validate EDG web service in Swagger run over the Kennedy Family asset collection
You will also see a cURL command, which you can test out:
curl -X 'GET' 'http://localhost:8083/tbl/service/kennedy_family/tbs/validate'
Hint
Be aware when running the validator that when the number of violations for your asset collection is large (i.e. > 100 thousand) the ability to display the report in the browser can cause performance issues. It is recommended you run the cURL command in this case. Even then, >1 million violations may result in performance degradation depending on the memory configuration for your SaaS server. Please consult our support team if you notice any issues with large validations.
3. Creating an asset collection
In this section you will learn how to create and delete a collection via the EDG Web API. Once again navigate to TBS Services and this time look for /service/_/tbs/createAssetCollection. You may notice that this is run at a “platform” level indicated by the “_” underscore in the URL. In other words, you do not need to specify any existing asset collection in the URL when creating one. You will specify this in the fields available. To do this first click “Try it out” and then enter in a collection ID for your new asset collection, e.g. “test_ontology”. You must also specify a name, e.g. “Test Ontology” and a type label, e.g. “Ontology”.
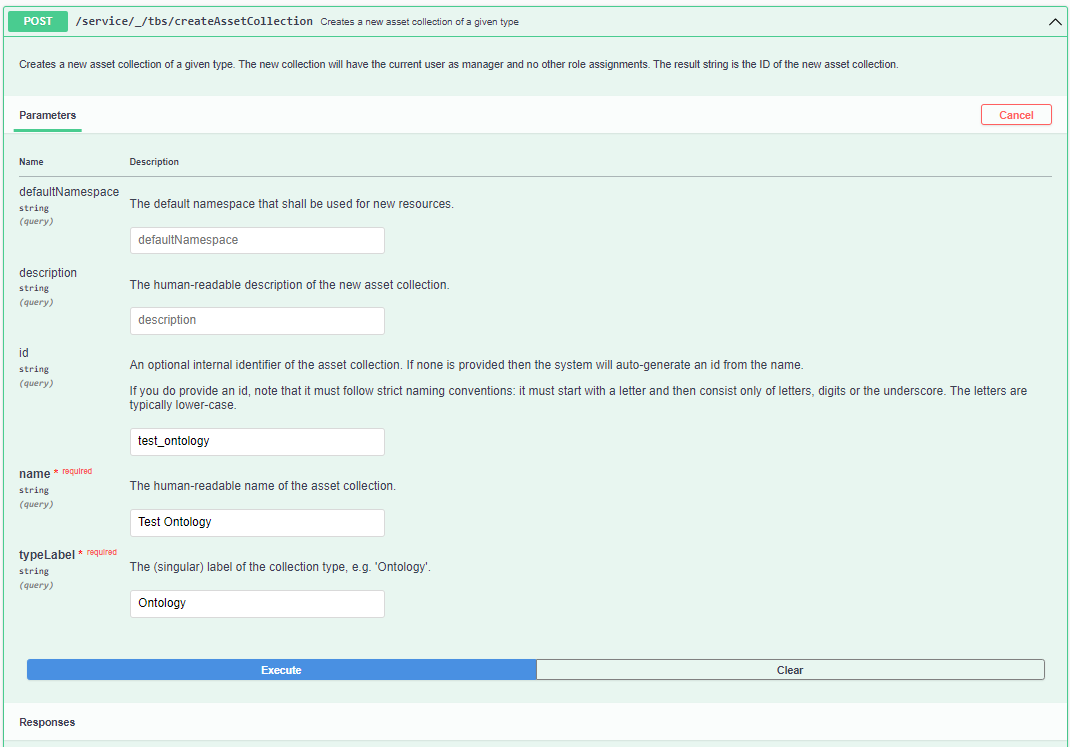
The create asset collection EDG web service in Swagger
You will now see the resulting “Test Ontology” on your EDG instance when you search in “Ontologies”. You can use a cURL command also to create your asset collection, with the parameters specified in the URL.
 curl -X 'POST' \
'http://localhost:8083/tbl/service/_/tbs/createAssetCollection?id=test_ontology&name=Test%20Ontology&typeLabel=Ontology'
The delete asset collection works in a similar way, although you need only specify one parameter, the id of the asset collection (e.g. “test_ontology”.)
4. Combining EDG Web Services using a Python Script
In this section you will use a Python script to first create an asset collection and then import some RDF into it. The Python script will take in the following parameters; server URL, id of the asset collection, name of asset collection, the asset type and finally name of input RDF file to import (which will need to be read in from the folder where the script is run).
The python code will need to import two libraries, requests (to handle the HTTP requests) and argsparse (to handle input parameters). Next we write a main function, which first checks we have provided the correct number of parameters. If yes, it takes these, stores them as variables, and passes them first to a function “edg_create” and next to a function “edg_import”.
import argparse
import requests


def main():

    parser = argparse.ArgumentParser(
        description="EDG Asset Collection Creation and Import"
    )
    parser.add_argument("--input_url", required=True, help="Input URL")
    parser.add_argument(
        "--asset_collection_id", required=True, help="Asset Collection ID"
    )
    parser.add_argument(
        "--asset_collection_name", required=True, help="Asset Collection Name"
    )
    parser.add_argument("--asset_type", required=True, help="Asset Type")
    parser.add_argument("--import_file_name", required=True, help="Import File Name")
    args = parser.parse_args()

    edg_create(
        args.input_url,
        args.asset_collection_id,
        args.asset_collection_name,
        args.asset_type,
    )

    edg_import(args.input_url, args.asset_collection_id, args.import_file_name)
Next we write the edg_create function. This requires the following parameters, the URL of the EDG server, the asset id and the asset collection name and type (e.g. “Ontology”). It then uses these to create the asset collection. On success, it prints the response as text.
def edg_create(input_url, asset_collection_id, asset_collection_name, asset_type):
    url = f"{input_url}/tbl/service/_/tbs/createAssetCollection"

    params = {
        "id": asset_collection_id,
        "name": asset_collection_name,
        "typeLabel": asset_type,
    }

    response = requests.post(url, params=params)

    if response.status_code != 200:
        error_message = f"Request failed for create asset collection with status code {response.status_code}: {response.text}"
        raise Exception(error_message)
Now we write the edg_import function. This requires the following parameters, the URL of the EDG server, the asset id and the name of the input file. It will then import the file into the asset collection. We hard code here the format of the input file as turtle, you could of course define another parameter. Finally, we call the main function.
def edg_import(input_url, asset_collection_id, import_file_name):
    url = f"{input_url}/tbl/service/{asset_collection_id}/tbs/importRDFFile"
    headers = {
        "accept": "application/json",
    }

    data = {"fileName": import_file_name, "record": "true", "format": "turtle"}

    files = {
        "file": (import_file_name, open(import_file_name, "rb"), "text/turtle"),
    }

    response = requests.post(url, headers=headers, data=data, files=files)

    if response.status_code == 200:
        print(response.text)
    else:
        error_message = f"Request failed for import with status code {response.status_code}: {response.text}"
        raise Exception(error_message)
You can download the complete code example here create_and_import.py, as well as an example input ttl file test_ontology.ttl
To test this, running EDG Studio locally, use the following command -
python create_and_import.py --input_url "http://localhost:8083" --asset_collection_id "test_ontology_new" --asset_collection_name "Test Ontology New" --asset_type "Ontology" --import_file_name "test_ontology.ttl"
On a successful execution you should see the following printed to command line:
{"message":"File with 11 statements has been imported successfully. \n","explanation":null,"success":true}
Again, this code assumes you are running on localhost with no authentication.