Developing an EDG Workflow Template
In this section we will walk through the process of creating a workflow template. For more information on workflows, see Understanding and Using Workflows. For more information on workflow templates, also see Workflow Templates. The workflow template developed here will demonstrate how to create new statuses, transitions, restrictions on transitions, and script to execute code when entering or leaving a state.
The scripts we demonstrate here use some basic Active Data Shapes ADS. For these sections, it is therefore strongly recommended that you are comfortable programming in `JavaScript`_ to complete this section, and also that you become familiar with the ADS documentation Introduction to ADS. If you are interested in integrating with external systems via your workflows, this section is extended in more detail in Accessing the External APIs from within an EDG workflow.
Contents
1. Workflow template overview
We will begin by designing our workflow. So, we must consider what workflow we wish to represent. Our workflow will consist of an option to import data from an external system into an asset collection, then enable the editing of that data, and finally the export of the edited data to an external system before it is committed to production. The workflow will restrict those who can create new workflows to the “data governor” role and “data producer” role, it will also restrict those who can accept changes during review to “data governor”. In other words, only people assigned that role in the governance model will be able to transition the state to the next state.
- The workflow will therefore require the following states;
Uncommitted: A start state
Importing Data: A state for importing data
Editing: A state to enable editing
Frozen for Review: A state to enable review of imports and edits. Restricted to “data governor”.
Committed: A state to export the result and commit to production
It also has the following transitions;
Transition: “Import data” which takes status “Uncommitted” -> “Importing Data”
Transition: “Make edits” which takes status “Importing Data” -> “Editing”
Transition: “Make edits” which takes status “Uncommitted” -> “Editing”
Transition: “Freeze for review” which takes status “Editing” -> “Frozen for Review”
Transition: “Reject changes” which takes status “Frozen for Review” -> “Uncommitted”
Transition: “Accept changes” which takes status “Frozen for Review” -> “Committed”
Ultimately, the workflow should look like this -
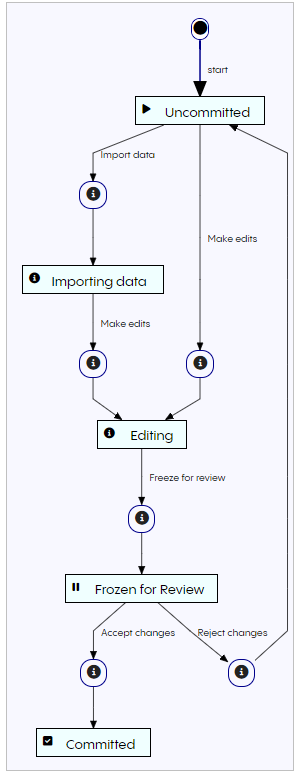
Workflow template states and transitions”
Finally we need to have two transition scripts. The first will be enacted on entering the “Importing Data” status. Here we will use some simple ADS code to indicate how you can interact with EDG. The second transition script will be on exiting the “Frozen for Review” status.
Now let us begin developing the workflow template in EDG.
2. Setting up your workflow template
The workflow template is created using an “Ontology” asset collection. So first create a new ontology and call it “Workflow Template”.
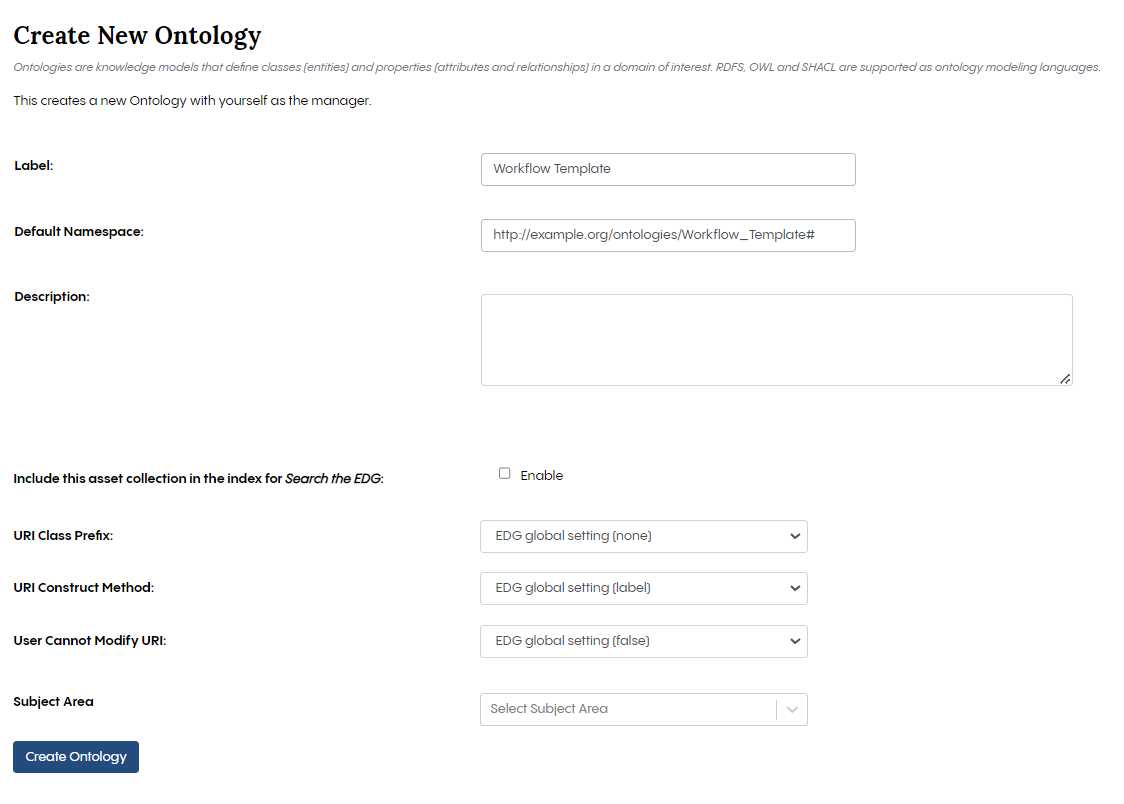
Creating a workflow ontology called “Workflow Template”
Next you will need to edit the metadata of the source panel for the ontology. Click on the home button, and then drag and drop the source panel for the asset collection. Add the following to the metadata owl:imports <http://topbraid.org/teamwork.ui> ;
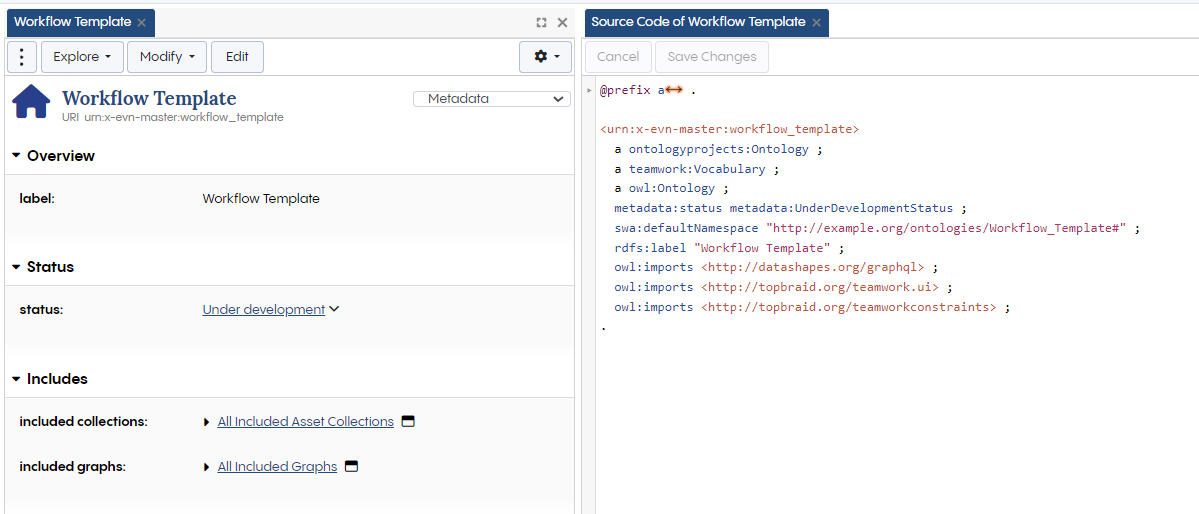
Adding the correct import for the workflow ontology
Next you must configure the ontology to enable the editing of instances, which is disabled by default. To do this, go to the Manage tab and select “Ontology Specific” and click the “Allow editing instances for this Ontology” in EDG.
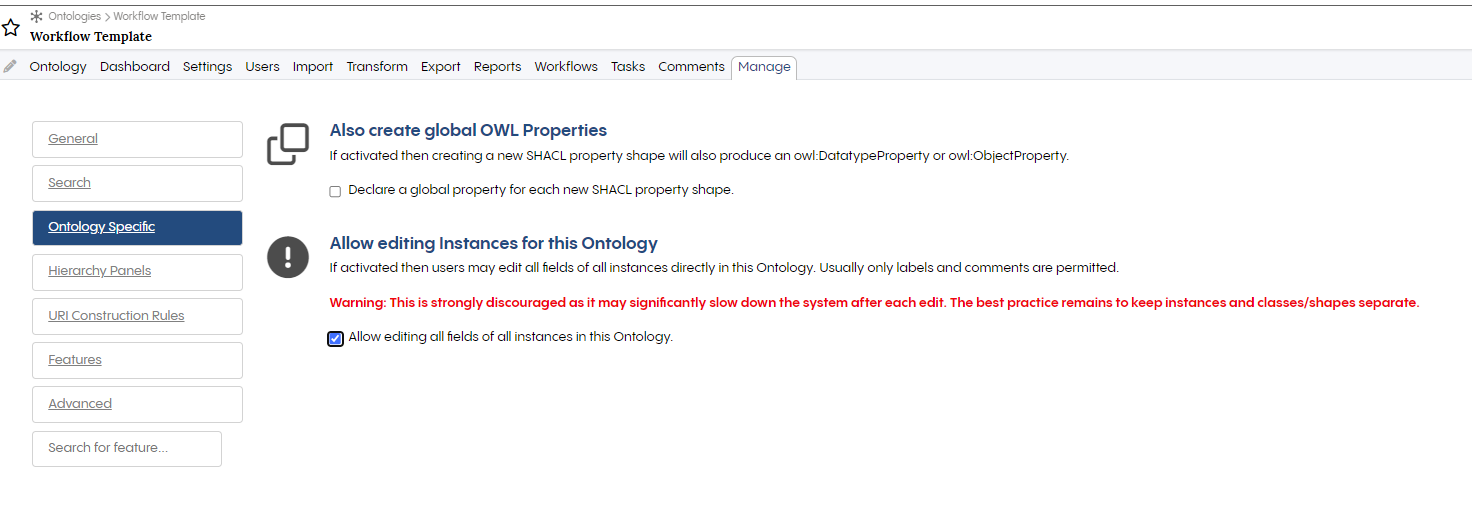
Configuring the ontology to be editable
Now the ontology is set up, let us create a workflow template instance, and begin to populate it with states and transitions.
The first step is to go to the Class Hierarchy panel and switch root to rdfs:Resource and search for “Workflow template (for Working copies)”. Select this by clicking on it. Now in the instance panel, click new and create a new instance, giving it a name (here we call it “Training instance of TagWorkflowTemplate).
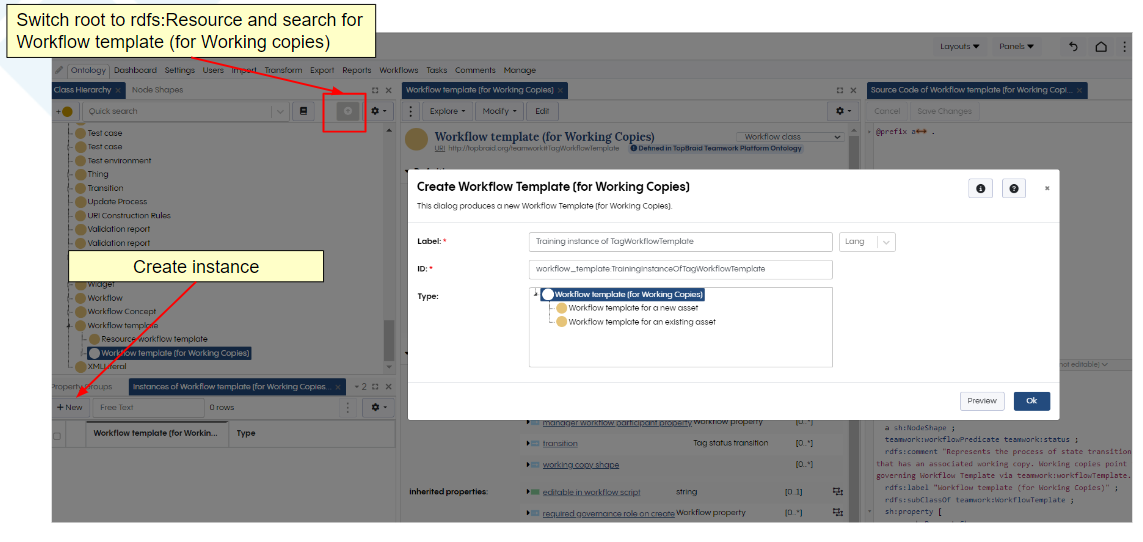
Create a workflow template instance in your ontology
Now we begin to populate our workflow template by first adding an initial status. Select “Uncommitted” from the drop down menu.
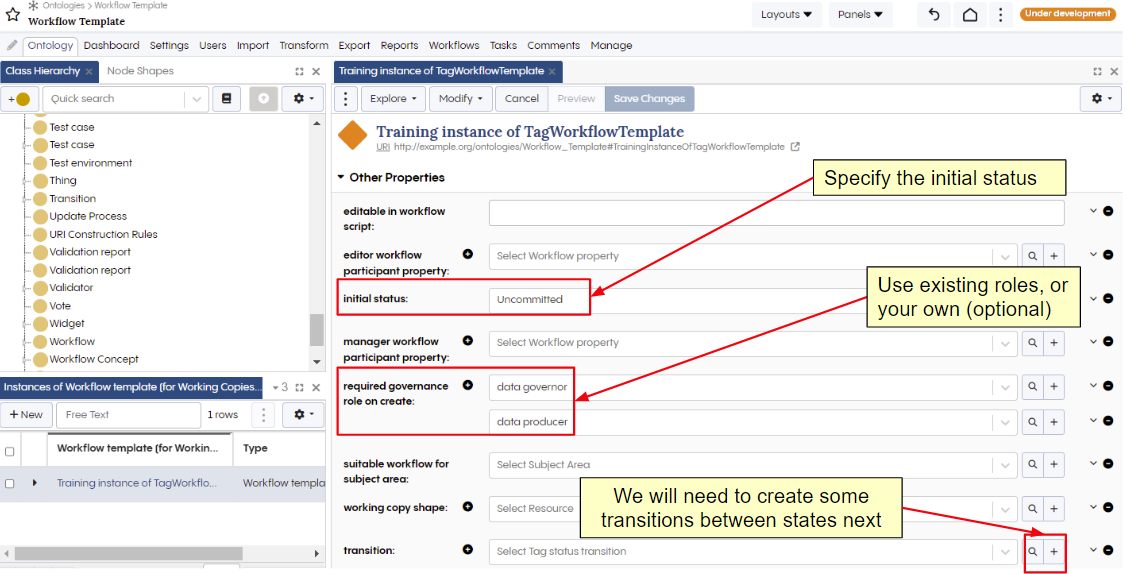
Configure the initial workflow state of the template
We can also configure some additional restrictions here, such as required governance roles for creating the workflow. So we add “data governor” role and “data producer” role. This will restrict those who can create a workflow to these two types of roles. Next, let us also create our transitions. This can be done directly from the form by clicking on the plus symbol in the transition field. Then fill in the following property values. For Label enter “Make edits” and give the same value for transition label. Next add “Uncommitted” as its “from status” and for its “to status” we will need to create a new status by clicking on the + button, like we did for transition. Call this status tag “Editing”.
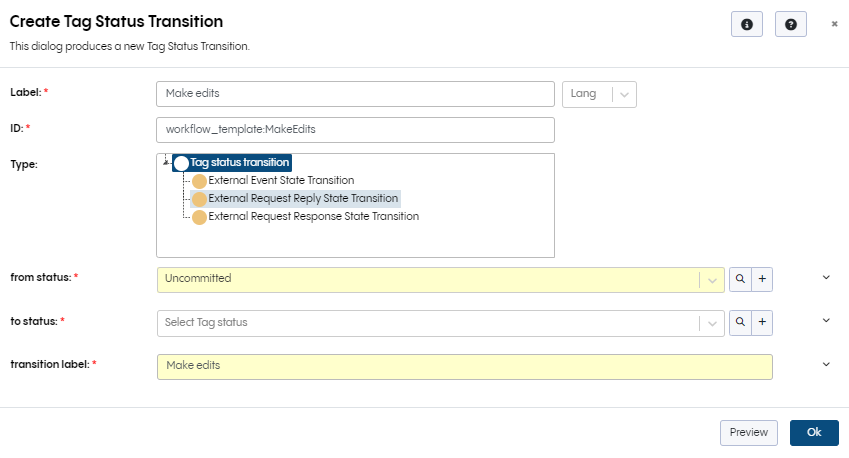
Create a transition for Make Edits
You should now have a new transition in your workflow template called “Make edits”, and if you click on this you should see the properties of the transition, i.e. a to and from status, one of which is the new status tag “Editing”.
Now let us repeat this process for each transition we have defined, and where we need to create a new tag status (e.g. for “Importing Data”) do this the same as before. Since we have two transitions with the same transition label “Make edits” we need to make sure that the labels and URI are different for these. So for the transition between Importing Data and Editing, call it “Make edits after import” but leave the transition label as “Make edits”. In the end you should have something that looks like this:
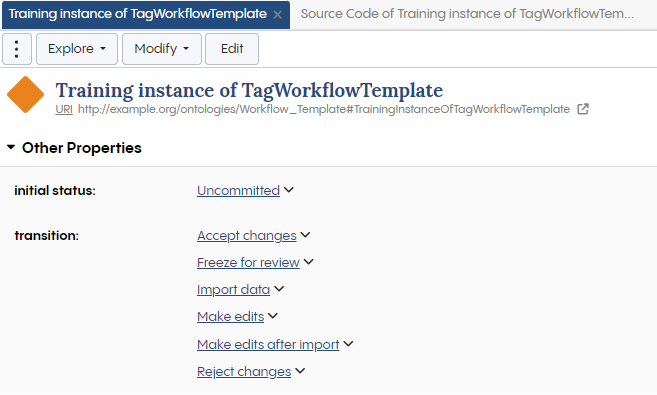
The workflow template with all transitions
You can also at any time access or examine the assets defined in this ontology through the “Local Assets” panel, which can be found in the Panels. Drag this anywhere into EDG. You should see the following local assets:
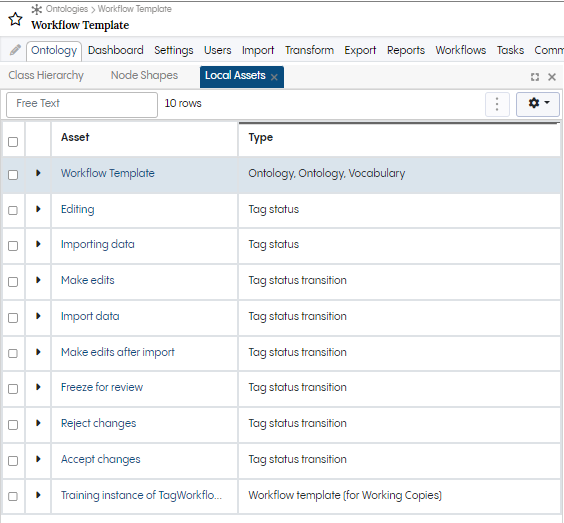
The workflow template with current list of local assets
2.1 Adding restrictions to the workflow template
We can also add some additional restriction to our transitions. To do this, we must again make use of the source panel. The first restriction we will add, is to require that some changes be made before you can transition to “Frozen for review”. Select the “Freeze for review” transition, and add the following triples teamwork:requiresChanges true ;.
workflow_template:FreezeForReview
   a teamwork:TagStatusTransition ;
   teamwork:fromStatus workflow_template:Editing ;
   teamwork:requiresChanges true ;
   teamwork:toStatus teamwork:FrozenForReview ;
   teamwork:transitionLabel "Freeze for review" ;
   rdfs:label "Freeze for review" ;
.
Next we will add a second restrition, so that only a “data governor” can accept the changes.
workflow_template:AcceptChanges
   a teamwork:TagStatusTransition ;
   teamwork:fromStatus teamwork:FrozenForReview ;
   teamwork:requiredGovernanceRole edg:dataGovernor ;
   teamwork:toStatus teamwork:Committed ;
   teamwork:transitionLabel "Accept changes" ;
   rdfs:label "Accept changes" ;
.
Okay, now we have our workflow template and our transitions and new statuses. You can now test your workflow template if you wish, by skipping to section Test your workflow template
Otherwise, let us now add some transition scripts.
3. Writing a transition script which writes some triples to the workflow graph
Now we have our workflow created, let us add a transition script to the “Importing Data” tag status so when the workflow enters this state, it makes an API call to the external web service and imports a ttl file.
First we add a new entry script to our status “Importing Data” via the edits option in the form. We can once again press the plus symbol.
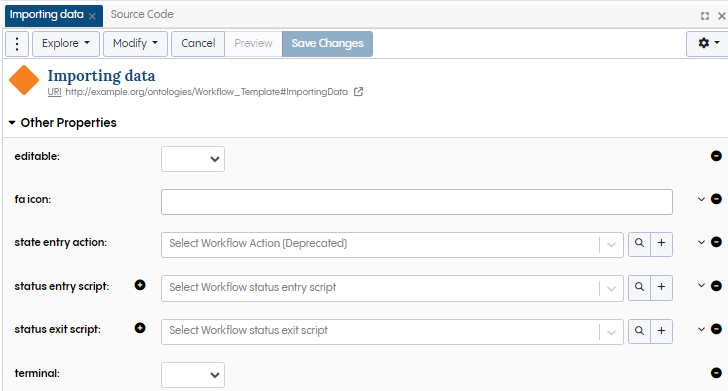
Editing the workflow status “Importing Data”
Let us call the script “workflow entry transition script”.
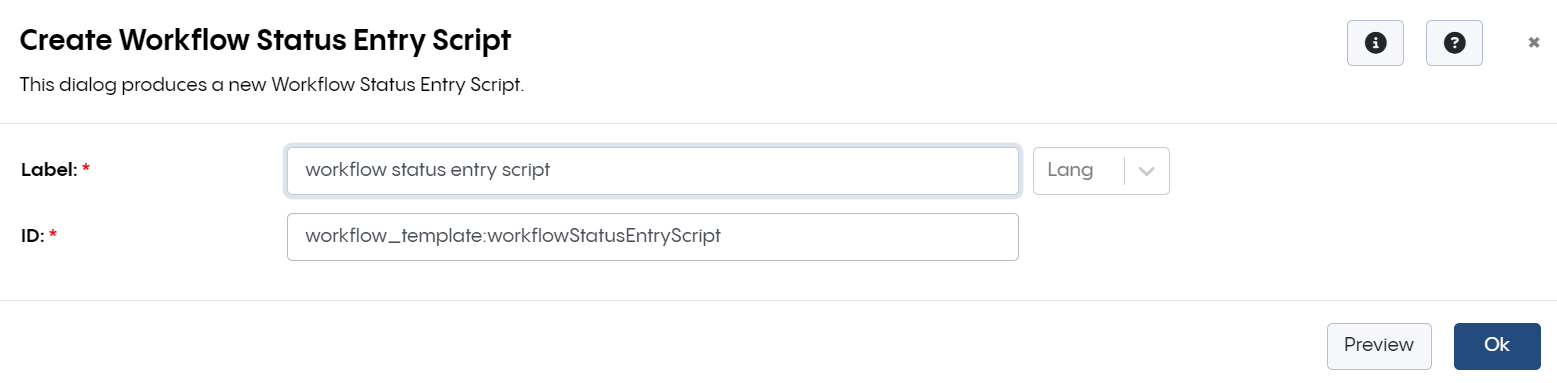
Adding workflow template entry script “workflow entry transition script”
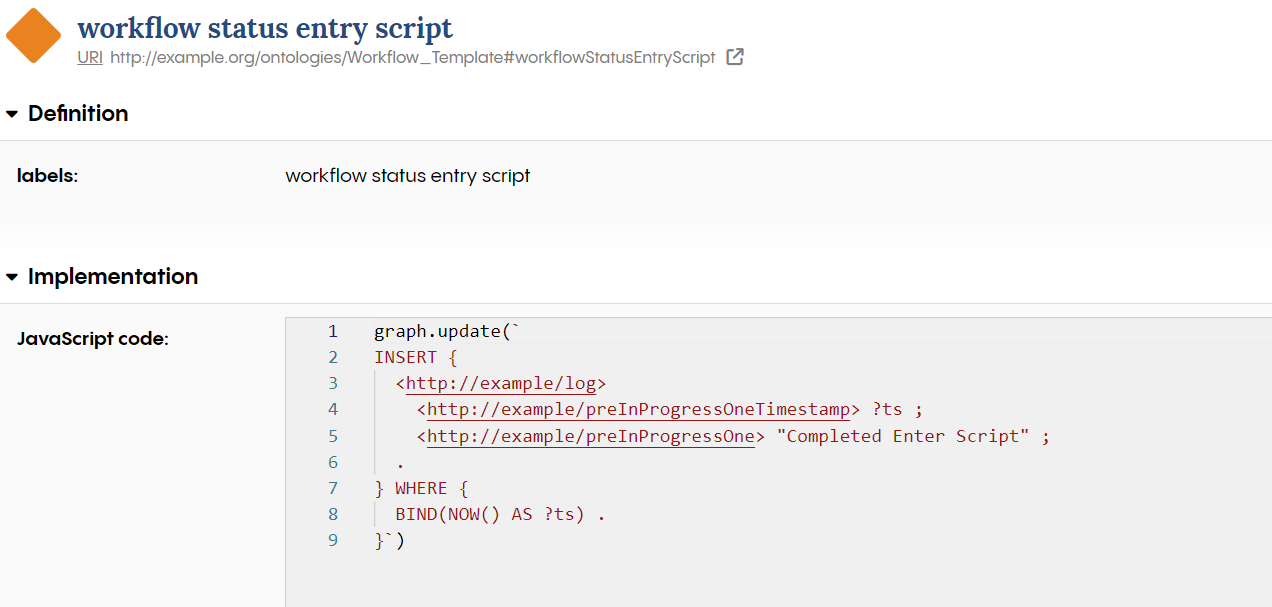
This entry script will simply write some logging data to the workflow asset collection. The SPARQL query adds a timestamp based on the current time on the EDG server, and a string.
graph.update(`
   INSERT {
   <http://example/log>
      <http://example/preInProgressOneTimestamp> ?ts ;
      <http://example/preInProgressOne> "Completed Enter Script" ;
   .
   } WHERE {
   BIND(NOW() AS ?ts) .
}`)
And that is the transition script. It should look something like this in your EDG workflow template.
Editing the workflow status “Importing Data”
Now, let us create a second transition script. Add this to the “Frozen for Review” status, but this time choose “status exit script”. Call this “workflow exit transition script”.
graph.update(`
INSERT {
<http://example/log>
   <http://example/preInProgressOneTimestamp> ?ts ;
   <http://example/preInProgressOne> "Completed Exit Script" ;
.
} WHERE {
BIND(NOW() AS ?ts) .
}`)
And that is the transition script. You can now test your workflow template in EDG.
4. Test your workflow template
In your workflow template ontology select the “export” tab. Now export the workflow template as a ttl file.
Once you have exported, you can now load it back into EDG to make it available to your asset collections as a workflow. To do this go to the top right corner of the screen and select “Workflows Teamplates”
Accessing the workflow templates available in EDG
From here you can load in your workflow template, from where you exported it to. It should look like this -
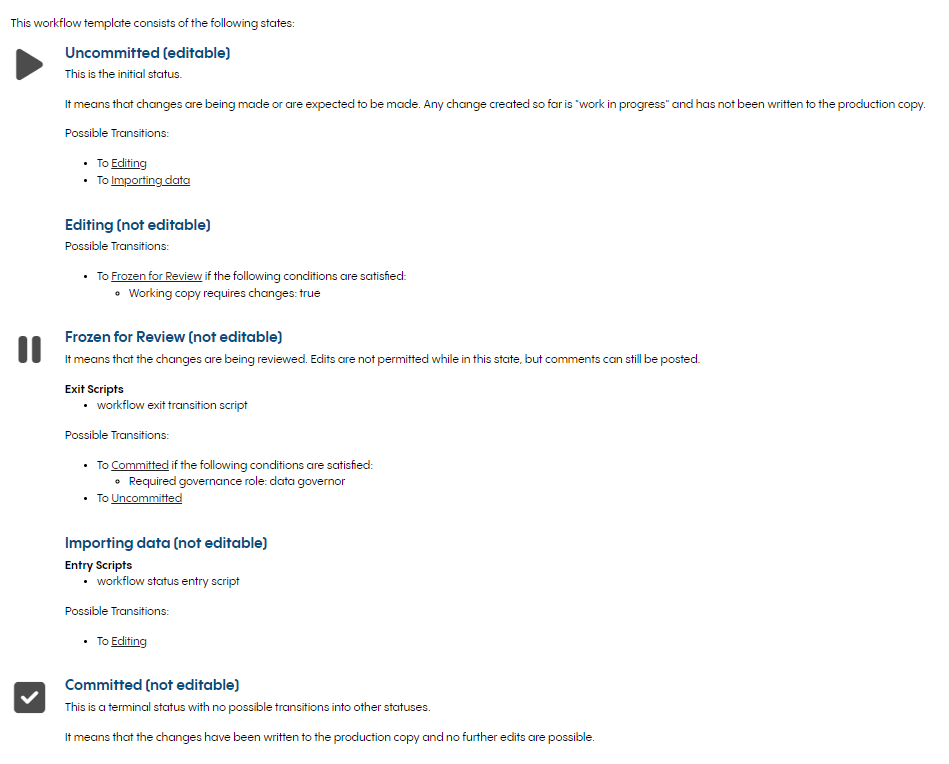
EDG workflow template uploaded
Now you can test your workflow by creating a new asset collection, and then starting a workflow and choosing this template. To test your script is running correctly you can query the asset collection either from within the workflow, or after commit, via the SPARQL panel using the following query:
SELECT * WHERE {
   <http://example/log> ?p ?o
}