Accessing the external APIs from within an EDG workflow template
In this section we will walk through the process of adding an import & export script to a workflow template, each of which make a call to external web APIs, first to import some data and then to export data. This section requires that you are familiar with Understanding and Using Workflows, and that you have completed the guide on creating workflow templates Developing an EDG Workflow Template. For more information on workflow templates, also see Workflow Templates.
The section also make reference to Active Data Shapes ADS. It is strongly recommended that you are comfortable programming in JavaScript to complete this section, and also that you become familiar with the ADS documentation Introduction to ADS. In particular, the section on Importing Data with ADS which covers the use of ADS for calling external APIs and importing data from those calls.
For external APIs we will just be re-using EDG APIs, specifically the SPARQL endpoint, which you can learn more about using in the section Accessing the SPARQL endpoint. For your own use cases, you would replace these with your own API calls. We will import the data into a data graph. The data graph will also need to have included the samples ontology “Schema.org Example”, to make the data visible in the Data Graph Editor.
Contents
1. Writing a transition script which calls an external API to import data
Building on the workflow you developed here, let us next add a transition script to the “Importing Data” tag status so when the workflow enters this state, it makes an API call to the external web service and imports a ttl file.
First we add a new entry script to our status “Importing Data” via the edits option in the form. We can once again press the plus symbol.
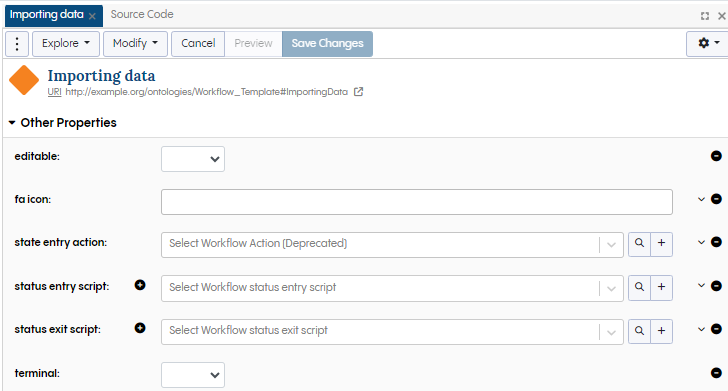
Editing the workflow status “Importing Data”
This entry script will make a call to our “external” API and add the returned data to the graph. Call the entry script “importing data entry script”. You can add a description also, e.g. “imports data from an API call”, or something more descriptive if required.
Now let us edit “JavaScript code” under “Implementation”. Here we will add the code to call the API and add the result to the graph. We will re-use some of what is described in Importing Data with ADS, specifically, by editing the code to access the SPARQL endpoint. Instead of running a SPARQL query over the “Kennedy Family” Data Graph, we will run a CONSTRUCT query, so that we can return some RDF in a “File”. This is because a typical scenario might be to import an RDF file in a workflow.
The following code makes a call to an EDG server running locally, making use of the ADS IO functionality .http, which supports HTTP requests. It passes the following parameter “query” and a string representing the CONSTRUCT query. This query will select all Persons in the “Kennedy Family” data graph. It also selects their birthyear. It then returns these as instances of type Person with birthYear. You can try the query out yourself using the SPARQL Query panel from within the Kennedy Family Data Graph to see the result. The code also specifies a header, which indicates the expected format (text/turtle) and also defines a suffix for the returned file.
let r = IO.http({
   url: 'http://localhost:8083/tbl/sparql',
   method: 'POST',
   params: {
      query: `
      CONSTRUCT {
         ?person a <http://schema.org/Person> .
         ?person <http://schema.org/birthYear> ?birthYear .
      }
      WHERE {
         GRAPH <http://topbraid.org/examples/kennedys> {
            ?person a <http://topbraid.org/examples/kennedys#Person> .
            ?person <http://topbraid.org/examples/kennedys#birthYear> ?birthYear .
         }
      }`
   },
   headers: {
      Accept: 'text/turtle'
   },
   toFileSuffix: 'ttl'
})
The next piece of code again makes use of ADS IO functionality, this time to take the file returned from the HTTP call, and to then parse the text value of that file (expecting an RDF file to be returned by the CONSTRUCT query). The resulting graph is then added to the current graph (which will be the workflow from where it is run) via the graph.update.
let tempGraph = IO.parseRDF(IO.uploadedFile(r.file).text)

graph.update(`INSERT { ?s ?p ?o } WHERE { GRAPH <${tempGraph}> { ?s ?p ?o }}`)
And that is the transition script. It should look something like this in your EDG workflow template. The next section we will export the resulting data using a similar approach -
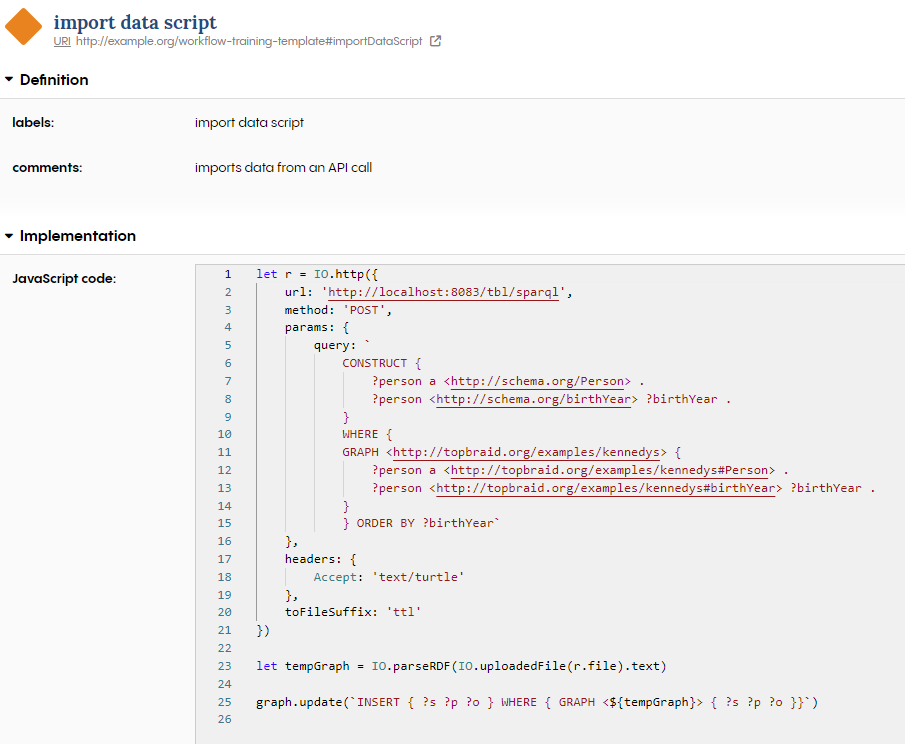
The workflow entry transition script for importing data
2. Writing a transition script which calls an external API to export data
Now, let us create a second transition script. We will call this one “Export Data Script”. We will be adding this to the “Committed” tag status. We must therefore add this transition script explicitly via the source panel. But let us begin by cloning the “importing data entry script” via the “Modify” button. Change the URI to something more appropriate, e.g. exportingDataEntryScript. You will be able to find this now in the “Local Assets” with a label something like “importing data entry script Copy”. Edit this label to read “exporting data entry script”. Also edit the comments if required, e.g. to “exports data from an API call”.
Here we re-use the external API that is explained in Pushing some data to an external API using ADS to push our data to the external API. You would replace this with your own external API.
let triples = graph.triples()
const dataString = IO.serializeRDF(triples, "text/turtle");

let response = IO.http({
   url: 'https://httpbin.org/post',
   method: 'POST',
   params: {
      body: dataString
   },
   headers: {
      Accept: 'text/turtle'
   }
})
response
3. Test your workflow
Finally, let us test the workflow. In your workflow template ontology select the “export” tab. Now export the workflow template as a ttl file.
Once you have exported, you can now load it back into EDG to make it available to your asset collections as a workflow. To do this go to the top right corner of the screen and select “Workflows Teamplates”
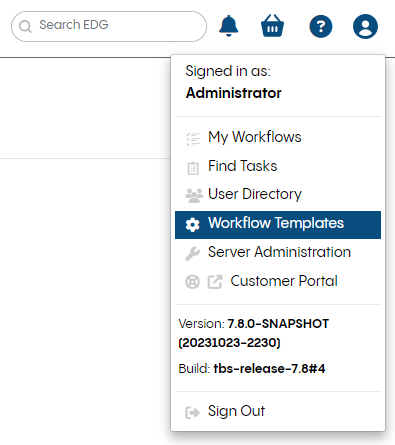
Accessing the workflow templates available in EDG
From here you can load in your workflow template, from where you exported it to. It should look like this -
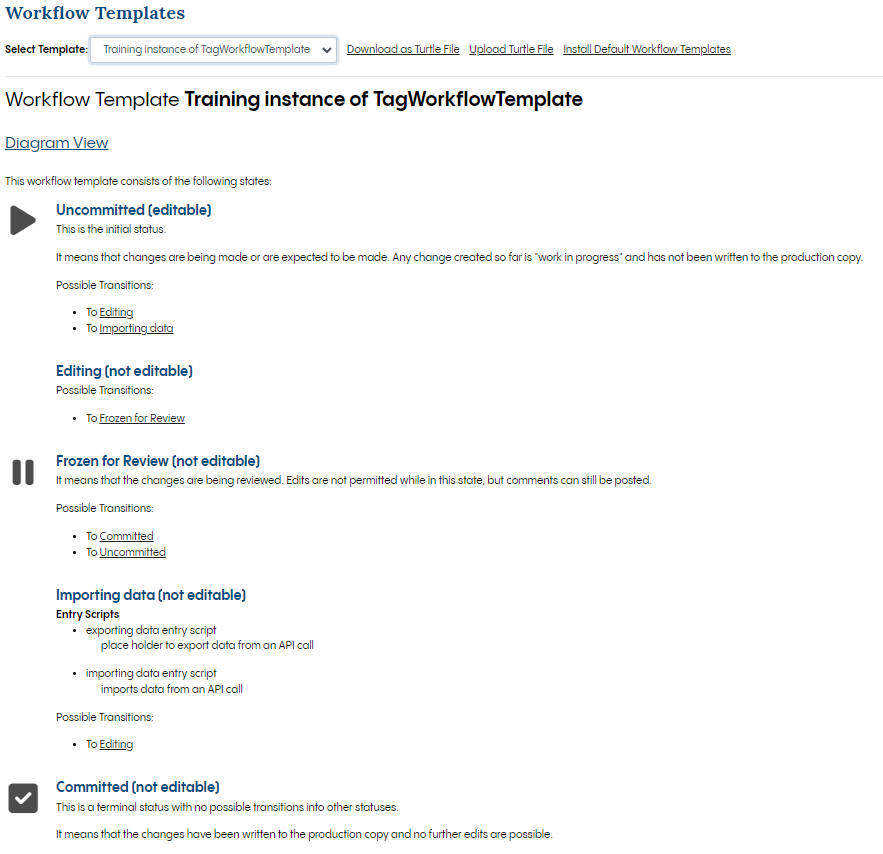
EDG workflow template uploaded