Accessing the external APIs within EDG
In this section we will walk through the process of accessing external APIs via the EDG Script Editor. First, we will look at passing some data to a sample endpoint. We are going to make use of https://httpbin.org to provide external APIs we can test, some of which respond with the content sent, or some dynamically generated content. Next we will make a call to a web service that returns a UUID, and we will use that UUID to create a new asset in an asset collection. Finally we show an example of connecting to an SQL database and inserting some data into a table. For the purposes of these examples, we will be using the TopQuadrant samples data.
The section will make reference to Active Data Shapes ADS. It is strongly recommended that you are comfortable programming in JavaScript to complete this section, and also that you become familiar with the ADS documentation Introduction to ADS. In particular, the sections on Working with Relational Databases via SQL and Importing Data with ADS which covers the use of ADS for calling external APIs.
For more information on the Script Editor, the complete documentation is available here Scripting with JavaScript and ADS.
Contents
1. Pushing some data to an external API using ADS
First let’s open one of our sample asset collections, e.g. the “Kennedy Family” sample, as we are going to send the data to the web service. Once you are in the asset collection, next open the Script Editor.
From within the script editor we are going to add the following code to access the graphs triples, and to then use the IO library to serialize the triples as turtle:
const triples = graph.triples()
const dataString = IO.serializeRDF(triples, "text/turtle");
Next, let us call the web service from https://httpbin.org called “post”. We make use of the IO library http request. We specify the url of our service, we pass the serialized triples as a string in the params body, and we specify the head as “text/turtle”.
const response = IO.http({
   url: 'https://httpbin.org/post',
   method: 'POST',
   params: {
      body: dataString
   },
   headers: {
      Accept: 'text/turtle'
   }
})
response
Finally we return the response, which should look something like this, where “data” contains the dataString passed to the web service -
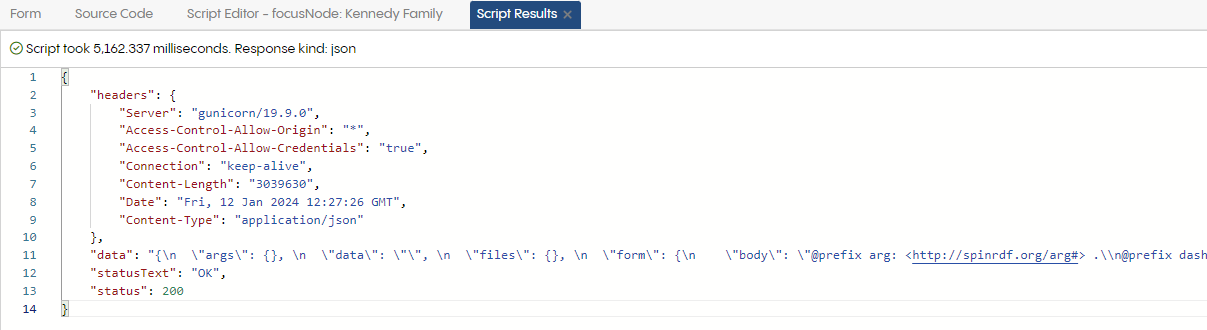
The response from calling post from https://httpbin.org and passing serialized triples as parameter
2. Pulling some data from an external API and using it to generate an asset
Now let us try another example where we pull some generated data. This time we are going to use one of the “Dynamic data” services from https://httpbin.org called “uuid”. This returns a JSON message with a generated UUID. We are going to use this UUID to create an instance of “Person” in the “Kennedy Family” Data Graph. The instance will have no other properties, but given a different web service which returns more data, you can follow the same process to generate instances. The Kennedy Family graph is available to download here - sample data.
Before we can use ADS though to generate new instances in our Script Editor, we must first generate the Script APIs in EDG, and this process is described here Auto-Generated API. We need to therefore go to “Schema.org Example” ontology which is included in the “Kennedy Family” Data Graph, select the home button to access the metadata on the asset collection, and in the drop down menu on the type right of the form, we select “Script API”
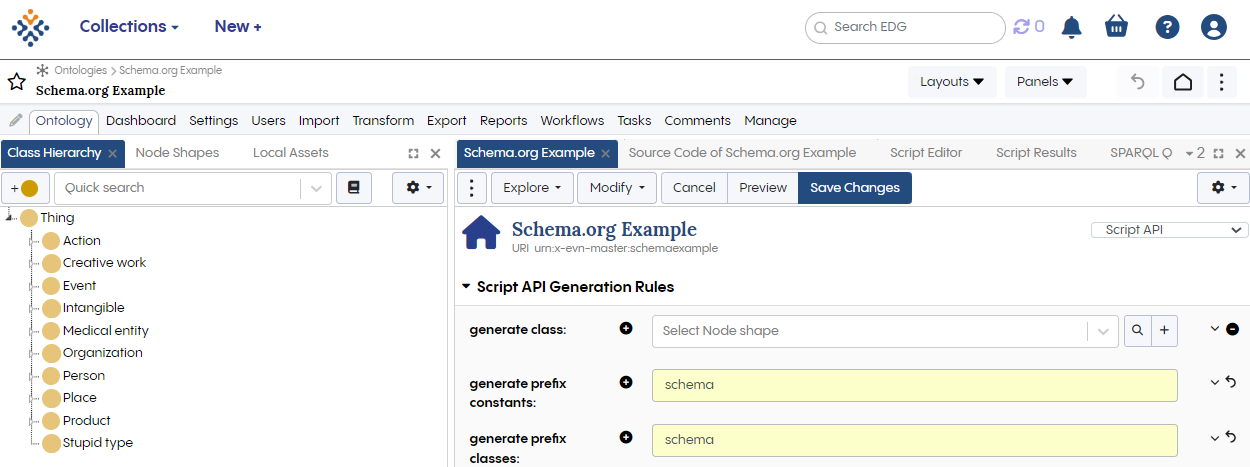
Configuring the prefixes to generate Script APIs for schema.org
Next you need to also need to configure the script editor in the “Kennedy Family” Data Graph to allow scripts to make changes.
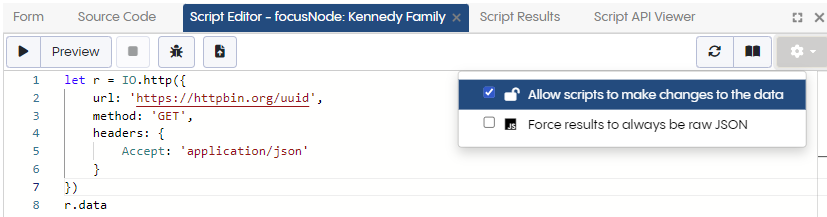
Configure script editor to allow scripts to make changes
You will now be able to use ADS to generate instances.
Now let us begin to write and test our code. First, let’s make sure we can call the web service and get the correct response. Try the following piece of code.
let r = IO.http({
   url: 'https://httpbin.org/uuid',
   method: 'GET',
   headers: {
      Accept: 'application/json'
   }
})
r.data
It should return a response similar to this:
{
"uuid": "262f9c3f-0723-4fca-843b-044c5992cf8d"
}
Now remove the r.data and instead let’s create a new instance, and use this UUID to generate its URI.
let person = schema.createPerson({
   uri: 'http://topbraid.org/examples/kennedys#' + encodeURIComponent(r.data)
})
This will just create an instance of type Person. You can add other properties that are available to Person, such as name, etc. in the JSON passed as the parameter. Without a Label defined, it will display the URI for the instance in the search panel. You can add the following line: person.add(rdfs.label, "Aaron") and then that will display. The search panel returns results alphabetically based on its RDFS label, and so Aaron should appear first, or close to first. EDG requires rdfs:Labels for many of its UI features, and running the SHACL validator will also generate a violation if rdfs:Label is not defined. In the case of taxonomies, skos:prefLabel is used instead of rdfs:Label.
So these are two simple examples of pushing and pulling data from external APIs. In the following section, we will look at working with external APIs and using workflows.
3. Writing some taxonomy data to an SQL Database
Now let us try another example where we write some taxonomy data to an SQL Database. To enable SQL on EDG you will need to have the appropriate JDBC driver in the EDG tomcat installation. For SaaS users of EDG you will need to reach out to the support team. For Onprem users, the following explains where to put the JDBC driver: Installing JDBC Drivers.
In this example we are going to use the “Geography Taxonomy” data provided with the sample data. The SQL Database is going to have Tables which represent continents, countries, cities, etc. We are going to export the Geography Taxonomy data into SQL. In this simple example we will focus on prefLabels, and we shall user their values so that one column in our Continents table will be the English prefLabel called “Name” and a second column will be the other prefLabels called “prefLabels” (with or without the English value).
We will be running the code from the Script Editor. First let us select all the concepts in the taxonomy which are of type “Continent”. To do this we just need the following line of ADS code which runs a select query over the graph.
graph.select(`
   SELECT *
   WHERE{
      ?s a g:Continent.
      }
`);
Run this and it should return the following results:
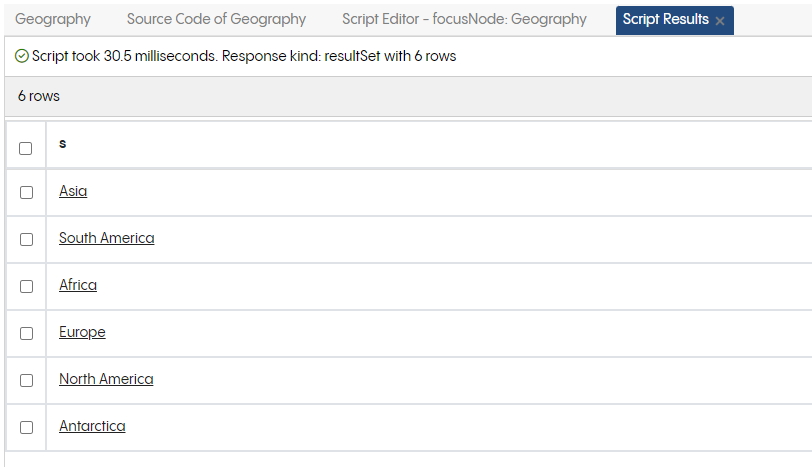
Result of running graph.select in script editor for geography taxonomy
We can add the following line to our query ?s skos:prefLabel ?pLabel. to then return all the prefLabels. You will notice that there are multiple values. So let us for now, do a simple concatenation for our prefLabel column, and use the English prefLabel for the name of the continent.
const result = graph.select(`
SELECT ?s ?englishLabel (GROUP_CONCAT(?otherLabels; SEPARATOR=", ") as ?concatenatedLabels)
WHERE {
?s a g:Continent;
   skos:prefLabel ?englishLabel.

OPTIONAL {
   ?s skos:prefLabel ?otherLabels.
   #FILTER(LANG(?otherLabels) != "en")
}

FILTER(LANG(?englishLabel) = "en")
}
GROUP BY ?s ?englishLabel
`);
Next let us generate an INSERT statement from our query result. The following code maps the result from our query into string values, which are then used to generate our INSERT.
const insertStatements = result.bindings.map(t => {

   const name = t.englishLabel.lex
   const prefLabels = t.concatenatedLabels
   return `('${name}', '${prefLabels}')`;
});

const combinedInsertStatement = `INSERT INTO continent (name, label) VALUES ${insertStatements.join(',  ')};`;
Finally, let us take our values and insert them into our database. We are going to reuse the code presented in Updating SQL Databases with ADS, which makes use of a theoretical endpoint called localhost:3306/world. So first we make a connection (using your own username and password).
let conn = {
   url: 'jdbc:mysql://localhost:3306/world',
   user: 'root',
   password: '...'
}
Alternatively, if you do not wish to expose your password in EDG, you can make use of EDGs secure password manager, see Password Management Admin Page. In the Password Management page, save your password with your SQL username, e.g. “root” and use the same URL.

How your secure password should look for connecting to MySQL
Then you simply remove the password parameter from your connection -
let conn = {
   url: 'jdbc:mysql://localhost:3306/world',
   user: 'root'
}
Finally, we pass the connection and our combined insert query into our ADS SQL update.
SQL.update(conn, combinedInsertStatement);
All going well, the data should be written to your database.